In Angular, we can use different UI libraries, but Angular Material is one of the best UI component libraries that are made specifically for Angular. Angular Materials provide the developer with reusable UI components that help the developer to use ready-made components, fast development, and one best UI design.
In this tutorial, we have two important goals.
- First, how to install angular material and step need to configure angular material in our angular project.
- The second will demonstrate how to reuse Angular material components in our project in Angular 14.
What is Angular Material?
Angular Material is both a UI Component framework and a reference implementation of Google’s Material Design Specification developed by Google in 2014. Material Design is a tool for front-end frameworks, which helps you with visual, motion, and interaction design. It also helps to adopt or provide responsive designs to different devices and different screen sizes.
The project provides a set of reusable, well-tested, and accessible UI components based on Material Design. These components help in making your application more consistent, fast, versatile, and even designing responsive websites. We can also use a popular UI framework like the Bootstrap component in our angular project.
How to install Angular Material?
To use Angular material in our angular project, we need to set up the environment for Angular. We need Nodejs to install the dependency package in our angular project using the npm command. We discuss detail later and need the following brief steps to install Angular Material libraries.
- Install Nodejs in our system.
- Install the Angular CLI
- Create a workspace for the Angular Project
- Add Angular Material
- Import the Angular Material modules in the app.module.ts or separate Material module.
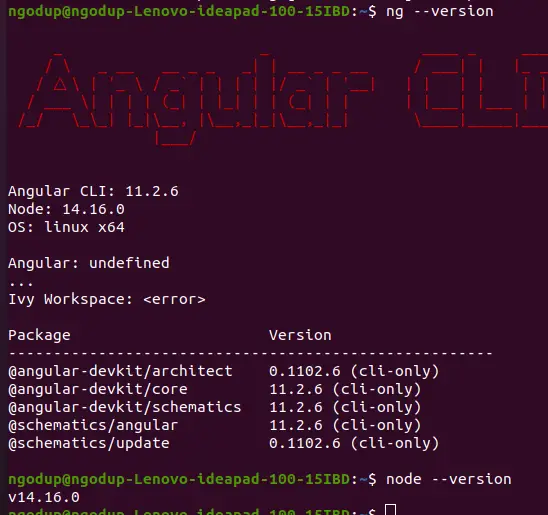
Step 1: Installing Nodejs and Angular CLI
We have a tutorial on how to install Node js and angular CLI in the Ubuntu operating system. We have to install Angular CLI globally using.
npm install -g @angular/cliOnce both Nodejs and angular CLI are ready then next we need to create an angular project.
ng new angularMatExStep 2: How to add and install Angular Material in our project
To add Angular material to our project we need to execute the following command in the console. This command will install the Angular material, the Component Dev Kit (CDK), and the Angular animation libraries. There are two ways to install angular material based on the Angular Devkit version.
Installing Angular material in Angular Devkit 6 and higher
If you are using Angular devkit 6 and higher, then there is one step to install Angular material on our project. You don’t need to run any other commands.
ng add @angular/materialIn the early version of angular material, we need to install angular material and angular animation separately and also manually need to import BrowserAnimationModule in the app.module.ts file. But now add command install and import all above tasks automatically to our angular project. We only need to run add Angular material command and it will ask the developer the following questions to determine which features to include. Here is a screenshot of the choice we had taken for configuring Angular material in our project.
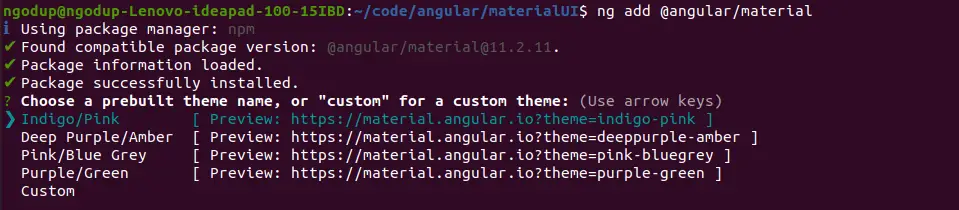
We have selected an Indigo/Pink material theme, Angular material provides a few prebuilt theme options for us. We have listed options provide by adding angular material to our project
- Choose a prebuilt theme name, or “custom” for a custom theme.
- Set up global Angular Material typography styles and type yes.
- Set up browser animations for Angular Material and type yes.
Once we have executed ng add material, it will add BrowserAnimationModule in the app.module.ts file. We need this module to add animation for Angular material animation.
@NgModule({
  imports: [BrowserAnimationsModule],
})

export class AppModule { }
The ng add command will additionally perform the following configurations in our Angular application:
- Add project dependencies to package.json
- Add the Material Design icon font to your index.html
- Add the Roboto font to your index.html
- Add selected Material Design theme CSS
- in angular.json style array object
- Add a few global CSS styles to remove margin from the body, set 100% to HTML and body, and make Roboto the default font for our application.
The angular.json file styles section has a selected theme to add automatically when we run ng add @angular/material
...
"styles": [
              "./node_modules/@angular/material/prebuilt-themes/indigo-pink.css",
              "src/styles.scss"
            ],
...
Now we have done with Angular material configuration and let’s add any Angular material component to our Angular application.
Installing Angular material in Angular Devkit below 6?
We don’t need to follow this step, as is for the Angular version below 6. The angular team has released Angular version 13, you can skip this section. But in case you are using the Angular version below the 6 then follow these steps.
Install Angular Material, Angular CDK, and Angular Animations
npm install @angular/material @angular/cdk @angular/animations --save Configure the browser animations module in the app.module.ts file.
@NgModule({ imports: [BrowserAnimationsModule], }) export class AppModule { } Step 3: Import the Angular Material component modules
Angular material provides lots of built-in components that are ready to use. To use specific Angular material components, we need to import each material component separately. Let’s edit app.module.ts to add the required Angular material module.
import { NgModule } from '@angular/core';
import { BrowserModule } from '@angular/platform-browser';
import { AppRoutingModule } from './app-routing.module';
import { AppComponent } from './app.component';
import { BrowserAnimationsModule } from '@angular/platform-browser/animations';
import { FormsModule } from '@angular/forms';
import { MatSnackBarModule } from '@angular/material/snack-bar';
import { MatFormFieldModule } from '@angular/material/form-field';
import { MatButtonModule } from '@angular/material/button';
import { MatInputModule } from '@angular/material/input';
import { MatDatepickerModule } from '@angular/material/datepicker';
import { MatNativeDateModule } from '@angular/material/core';


@NgModule({
  declarations: [
    AppComponent
  ],
  imports: [
    BrowserModule,
    AppRoutingModule,
    FormsModule,
    BrowserAnimationsModule,
    MatSnackBarModule,
    MatFormFieldModule,
    MatButtonModule,
    MatInputModule,
    MatDatepickerModule,
    MatNativeDateModule
  ],
  providers: [],
  bootstrap: [AppComponent]
})
export class AppModule { }
If you are using many Angular material components, then it is best and good practice to make separate modules for Angular material components. Let’s create a file called the ng-material.module.ts file to add our previous example material module. Here we need to do three tasks.
- To import Angular material components in our custom Material module.
- To export Angular material components so that we can use them in our project.
- Import our material module in our app.module.ts file.
import { NgModule } from '@angular/core';
import { CommonModule } from '@angular/common';
import { MatButtonModule } from '@angular/material/button';
import { MatNativeDateModule } from '@angular/material/core';
import { MatDatepickerModule } from '@angular/material/datepicker';
import { MatFormFieldModule } from '@angular/material/form-field';
import { MatInputModule } from '@angular/material/input';
import { MatSnackBarModule } from '@angular/material/snack-bar';

const neededMaterialModule = [
        MatSnackBarModule,
        MatFormFieldModule,
        MatButtonModule,
        MatInputModule,
        MatDatepickerModule,
        MatNativeDateModule
];

@NgModule({
    declarations: [],
    imports: [
        CommonModule,
       neededMaterialModule
    ],
    exports: [
        neededMaterialModule
    ]
})
export class NgMaterialModule { }
If you have any other Angular material then import it into our material module, this will make our code cleaner and easy to read. Let’s now import our custom Angular material module in the app.module.ts file.
...
import { NgMaterialModule } from './ng-material.module';

@NgModule({
  declarations: [
    AppComponent
  ],
  imports: [
    ....
    NgMaterialModule,
  ],
  providers: [],
  bootstrap: [AppComponent]
})
export class AppModule { }
An example of an Angular material component in an Angular
Angular Material offers a wide variety of UI components based on the Material Design specification. We can add and select what we needed from the Angular material component. Here are some of the Angular material components.
- Material Table component
- Toolbar component
- Grid List material Component
- Material paginator
- Material slider
- Angular Material Icon
And more, Angular material provides lots of prebuilt components that are ready to use.
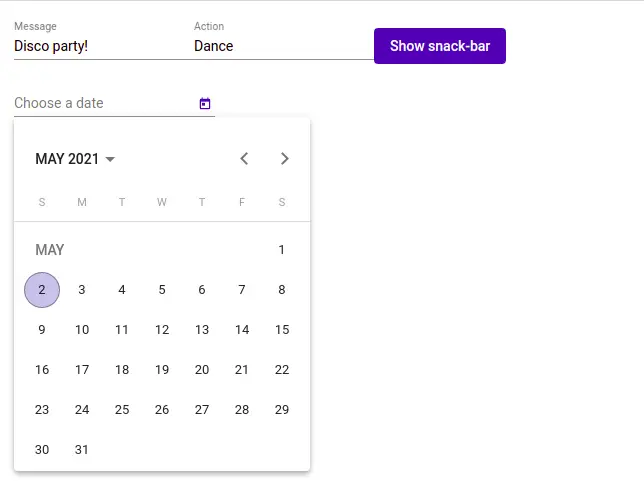
How to use Angular material components?
Here we’ll demonstrate a few examples of angular material like material date pickers, buttons and form fields, etc. To use each Angular material component, we should import their relevant module into the app.module.ts file for instance. Here is a screenshot of our example of Angular material components in our application.
To edit app.component.ts import the MatSnackBar component in our app.component.ts file.
import { Component } from '@angular/core';
import {MatSnackBar} from '@angular/material/snack-bar';

@Component({
  selector: 'app-root',
  templateUrl: './app.component.html',
  styleUrls: ['./app.component.scss']
})
export class AppComponent {
  constructor(private _snackBar: MatSnackBar) { }

  openSnackBar(message: string, action: string) {
    this._snackBar.open(message, action, {
      duration: 2000,
    });
  }
}
In the app.component.html template, add the material form field, and material data picker in our template.
<div class="container">
  <mat-form-field>
    <mat-label>Message</mat-label>
    <input matInput value="Disco party!" #message>
  </mat-form-field>

  <mat-form-field>
    <mat-label>Action</mat-label>
    <input matInput value="Dance" #action>
  </mat-form-field>

  <button mat-flat-button color="primary" (click)="openSnackBar(message.value, action.value)">Show snack-bar</button>

  <div>
    <mat-form-field>
      <mat-label>Choose a date</mat-label>
      <input matInput [matDatepicker]="picker">
      <mat-datepicker-toggle matSuffix [for]="picker"></mat-datepicker-toggle>
      <mat-datepicker #picker></mat-datepicker>
    </mat-form-field>
  </div>
</div>

<router-outlet></router-outlet><
How to change Angular material themes?
Angular material has four themes by default, when we are adding the material library to our Angular project we have to select one theme. We can change the material theme at any time and we have selected an indigo-pink theme. We can change it to another theme, let open n/node_modules/@angular/material/prebuilt-themes/ we can see all four themes as follow.
- deeppurple-amber.css
- indigo-pink.css
- pink-bluegrey.css
- purple-green.css

In the angular.json file, we have a styles array contenting the list of all styles. We only need to change the material theme name only, as we have changed it from an indigo-pink to a purple-green theme.
Conclusion
In this article, we have explored how to install angular material in our application. Also, demonstrate how to use a few ready-made angular material components in our example. I hope that this article was able to get you up and running with Angular material. Follow me on my GitHub collection, I had code on Angular, react, and Ionic framework.
Related Articles
- How to implement Angular material form in Angular?
- Angular Radio button |angular material radio button?
- Angular material checkbox: color, label direction
- How to implement Angular checkbox input in Angular?
- Angular Material input components and directives
- Angular material autocomplete example
- How to implement Angular material dropdown | select .?
- Angular Material button: Color, Size, toggle button
- How to implement Angular material accordion in Angular .?
- How to implement Angular material tabs?
- How to implement Angular material snackbar | toast in Angular?
- How to implement Angular material dialog .?
- How to implement Angular material grid .?
- How to implement Angular material list in Angular .?
- How to implement Angular material card in Angular?
- How to implement angular material datepicker in Angular .?
- How to implement the Angular material table?