Ionic two way data binding helps users to exchange data from the component to the view and from the view to the component. It will help users to establish communication bi-directionally. Ionic Two-way data binding can be achieved using a ngModel directive in Angular. The 2-way data binding using (ngModel), is basically the combination of both the square brackets of property binding and parentheses of the event binding.
In this article, we will learn how to use Ionic Angular two way data binding with an example and what are different types of data binding avaliable in Ionic angular.
Ionic two way data binding types
Ionic Angular data binding is incredibly powerful and easy to use. An Angular data binding can be classified into three types based on the direction of data flow.
- One-way data-binding: From the data, source to view in template
- One-way data-binding: From the view in the template to a data source in typescript file.
- Two Way Data Binding
The syntax of Ionic Angular one-way binding:
// From model typescript to view
{{ expression }}
[Data Binding Target] = "Template Expression"

// From View to model
(target)="statement"
When data in the model changes, the view reflects the change, and when data in the view changes, the model is updated as well. This happens immediately and automatically, which makes sure that the model and the view are updated at all times.
There are different ways or types of using one-way data-binding from typescript files to view in a template. This one-way data binding can be further classified as below.
- String interpolation
- Attribute Binding
- Property Binding
- Style Binding
- Class Binding
<-- template -->
<input [(ngModel)]="username">
<p>Hello {{username}}!</p>

// in component
this.username = 'test'
We can change the input username from both view and model. We will create an example where we can change the user name and password from both view and component with help of two-way data binding.
Example of Angular Ionc two way data binding
Step 1: Create an Ionic Angular blank project, by running the following command.
ionic start twoWayApp blank --type=angular
cd twoWayApp
Step 2: We will create an array object login with two properties username and object. We’ll use ngModel to archive 2-way data binding in our ionic example. The ngModel directive allows us two-way data binding, this directive is part of FormsModule. So we need to import it into our app.module.ts file
import { FormsModule } from '@angular/forms';
imports: [
FormsModule
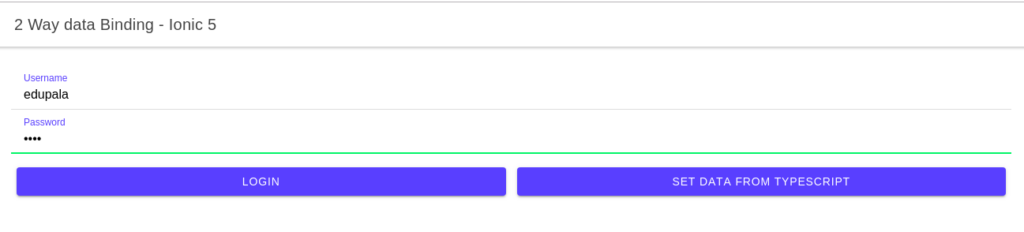
],Step 3: Add the following code in the home.page.html file, we have two input login and passwords. We can use the ngModel directive to set value in input in the template and also we can set value from component typescript. Change value of two-way data binding in view will reflect in a model, and vice versa.
<ion-header>
  <ion-toolbar>
    <ion-title>
      2 Way data Binding - Ionic 5
    </ion-title>
  </ion-toolbar>
</ion-header>

<ion-content>
  <div class="ion-padding">
    <form novalidate>
      <ion-list>
        <ion-item>
          <ion-label position="stacked" color="primary">Username</ion-label>
          <ion-input [(ngModel)]="login.username" name="username" type="text" required>
          </ion-input>
        </ion-item>
        <ion-item>
          <ion-label position="stacked" color="primary">Password</ion-label>
          <ion-input [(ngModel)]="login.password" name="password" type="password" required>
          </ion-input>
        </ion-item>
      </ion-list>
      <ion-row>
        <ion-col>
          <ion-button (click)="onLogin()" type="submit" expand="block">
           Login
         </ion-button>
        </ion-col>
        <ion-col>
          <ion-button (click)="setLoginData()" expand="block">
           Set data from typescript
          </ion-button>
        </ion-col>
      </ion-row>
    </form>
  </div>
</ion-content>
Step 4: Add the following code in the home.page.ts file
import { Component } from '@angular/core';
import { NgForm } from '@angular/forms';

@Component({
  selector: 'app-home',
  templateUrl: 'home.page.html',
  styleUrls: ['home.page.scss'],
})
export class HomePage {
  login: any = { username: '', password: '' };

  constructor() {}

  onLogin() {
    console.log('user name:', this.login.username );
    console.log('user password', this.login.password );
  }

  setLoginData() {
    this.login.username = 'edupala.com';
    this.login.password = '12345';
  }
}
Check more information on angular two-way data binding on official angular documentation.
Related posts
Very quickly this site will be famous amid all blogging viewers, due to it’s pleasant posts
thank you