Ionic comes with a number of pre-built components like modals, loading, toast, many more and Ionic alert is one of the components. The ionic alert component is one of the most used and basic components used in most Ionic applications. The Alert component is used to show alerts information to the users or collect data from the users. Alert appears on top of the app’s content and must be manually dismissed by the user before they can resume interaction with the app.
Setup an Ionic Alert project
With the release of ionic version 4, the Ionic framework no longer limited to angular, we can create the ionic projects in different front-end frameworks like Angular, Vue, and React. Let first create a blank Ionic Angular project for an Ionic alert.
ionic start alertExample blank --type=angularIonic Alert controller basic example
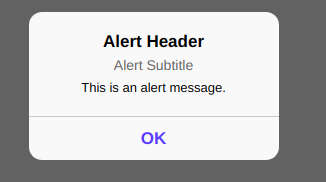
Let’s create an Ionic alert controller example to use basic usage of alert component options. In order to make an alert dialog, we need to import AlertController from the ionic/angular module. Edit the home.page.ts file to create an Ionic basic alert controller.
import { Component } from '@angular/core';
import { AlertController } from '@ionic/angular';

@Component({
  selector: 'app-home',
  templateUrl: 'home.page.html',
  styleUrls: ['home.page.scss'],
})
export class HomePage {

  constructor(private alertController: AlertController) { }

  async presentAlert() {
    const alert = await this.alertController.create({
      cssClass: 'basic-alert',
      header: 'Alert Header',
      subHeader: 'Alert Subtitle',
      message: 'This is an alert message.',
      buttons: ['OK']
    });

    await alert.present();
  }
}
In the home.page.html template add the following button to invoke the basic alert method.
<ion-button size="small" (click)="presentAlert()">Basic Alert</ion-button>Ionic alert component properties
The ionic alert controller comes with a number of options. We can edit and configure Ionic alerts using AlertOptions. We have the following alert options.
- header: Title option of the Ionic alert controller.
- subHeader: Subheader of Ionic alert.
- message: It displays the alert message to the user.
- buttons: In the array of buttons, each button includes properties for its text and its handler.
- cssClass: This attribute applied a custom class name to the alert so that we can edit or apply a style to our alert.
- inputs: This optional property allows the user to alert to collect information from users. Input is an array object and it has a type which can be an input type like radio, checkbox, text, and more.
Ionic alert with multiple buttons like confirm
The Ionic alert optional property button is an array object which can have its sub-properties, we can also apply cssClass properties on buttons also. In the message property, we can have a message with an HTML element, and the example below we have an image in the message property. In the example, we have three buttons, and each button can have a handler method.
Here’s a quick screenshot of what we’ll be building.
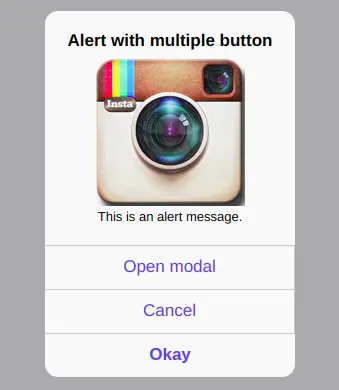
On the home.page we need to have an ionic button called Alert with buttons this will invoke our Ionic alert component with multiple buttons.
<ion-button size="small" (click)="presentAlertMultipleButtons()">Alert with buttons</ion-button>Edit the home.page.ts file to add our Ionic alert with buttons.
import { Component } from '@angular/core';
import { AlertController } from '@ionic/angular';

@Component({
  selector: 'app-home',
  templateUrl: 'home.page.html',
  styleUrls: ['home.page.scss'],
})
export class HomePage {

  constructor(private alertController: AlertController) { }

  async presentAlertMultipleButtons() {
    const alert = await this.alertController.create({
      cssClass: 'alert-buttons',
      header: 'Alert with multiple button',
      message: `<img src="./assets/images/logo.png" width="100">
      <br/>This is an alert message.`,
      buttons: [
        {
          text: 'Open modal',
          cssClass: 'btns-modal-alert',
          handler: (blah) => {
            console.log('Confirm Cancel: blah');
          }
        },
        {
          text: 'Cancel',
          role: 'cancel',
          cssClass: 'modal-button-cancel',
          handler: (blah) => {
            console.log('Confirm Cancel: blah');
          }
        }, {
          text: 'Okay',
          handler: () => {
            console.log('Confirm Okay');
          }
        }
      ]
    });

    await alert.present();
  }
}
Ionic alert prompt input
Alert optional property inputs allow us to collect information from the user and input has a sub-property type that allows us to use different HTML inputs like radio, Textarea, text, and more. In the example below, we have used different inputs including dates and numbers. Screenshot of what we are building.
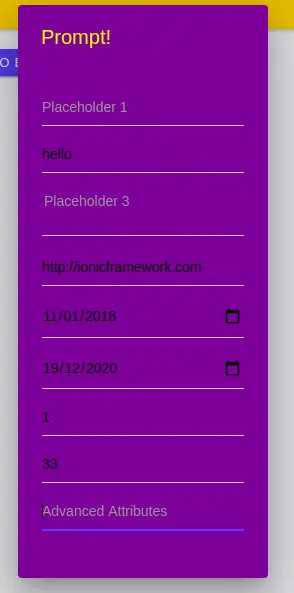
On the home.page we need to have an ionic button called Alert Prompt Input this will invoke our Ionic alert component of the Ionic alert prompt.
<ion-button size="small" (click)="presentAlertPrompt()">Alert Prompt Input</ion-button>Edit home.page.ts file to add Ionic alert prompt Input as.
import { Component } from '@angular/core';
import { AlertController } from '@ionic/angular';

@Component({
  selector: 'app-home',
  templateUrl: 'home.page.html',
  styleUrls: ['home.page.scss'],
})
export class HomePage {

  constructor(private alertController: AlertController) { }

  async presentAlertPrompt() {
    const alert = await this.alertController.create({
      cssClass: 'alert-prompt',
      header: 'Prompt!',
      inputs: [
        {
          name: 'name1',
          type: 'text',
          placeholder: 'Placeholder 1'
        },
        {
          name: 'name2',
          type: 'text',
          id: 'name2-id',
          value: 'hello',
          placeholder: 'Placeholder 2'
        },
        // multiline input.
        {
          name: 'paragraph',
          id: 'paragraph',
          type: 'textarea',
          placeholder: 'Placeholder 3'
        },
        {
          name: 'name3',
          value: 'http://ionicframework.com',
          type: 'url',
          placeholder: 'Favorite site ever'
        },
        // input date with min & max
        {
          name: 'name4',
          type: 'date',
          min: '2017-03-01',
          max: '2018-01-12'
        },
        // input date without min nor max
        {
          name: 'name5',
          type: 'date'
        },
        {
          name: 'name6',
          type: 'number',
          min: -5,
          max: 10
        },
        {
          name: 'name7',
          type: 'number'
        },
        {
          name: 'name8',
          type: 'password',
          placeholder: 'Advanced Attributes',
          cssClass: 'specialClass',
          attributes: {
            maxlength: 4,
            inputmode: 'decimal'
          }
        }
      ],
      buttons: [
        {
          text: 'Cancel',
          role: 'cancel',
          cssClass: 'secondary',
          handler: () => {
            console.log('Confirm Cancel');
          }
        }, {
          text: 'Ok',
          handler: () => {
            console.log('Confirm Ok');
          }
        }
      ]
    });
    await alert.present();
  }
}
Ionic alert with radio alert
Alert can have a list of radio buttons by using the alert input sub-property type. We can’ mix alerts with other input like text and checkboxes. An alert option allows the user to select one option among different options. Screenshot of what we are making.
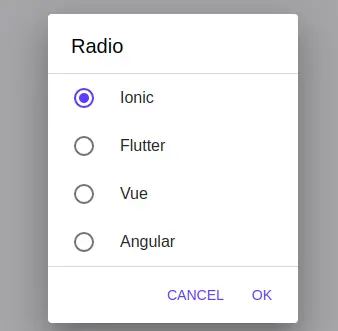
Add a button in the home.page.html template to invoke alert radio options.
<ion-button size="small" (click)="presentAlertCheckbox()">
  Alert Checkbox Input
</ion-button>
Edit home. page typescript to add alert radio options.
import { Component } from '@angular/core';
import { AlertController } from '@ionic/angular';

@Component({
  selector: 'app-home',
  templateUrl: 'home.page.html',
  styleUrls: ['home.page.scss'],
})
export class HomePage {

  constructor(private alertController: AlertController) { }

  async presentAlertRadio() {
    const alert = await this.alertController.create({
      cssClass: 'radio-alert',
      header: 'Radio',
      inputs: [
        {
          name: 'Ionic',
          type: 'radio',
          label: 'Ionic',
          value: 'ionic',
          checked: true
        },
        {
          name: 'Flutter',
          type: 'radio',
          label: 'Flutter',
          value: 'flutter'
        },
        {
          name: 'Vue',
          type: 'radio',
          label: 'Vue',
          value: 'Vue'
        },
        {
          name: 'Angular',
          type: 'radio',
          label: 'Angular',
          value: 'angular'
        }
      ],
      buttons: [
        {
          text: 'Cancel',
          role: 'cancel',
          cssClass: 'secondary',
          handler: () => {
            console.log('Confirm Cancel');
          }
        }, {
          text: 'Ok',
          handler: () => {
            console.log('Confirm Ok');
          }
        }
      ]
    });

    await alert.present();
  }
}
Ionic alert checkbox options
Alert can have a list of checkbox options by using the alert input sub-property type. We can’ mix the checkbox with other input like alert. An alert checkbox option allows the user to select more than one option among different options. Screenshot of what we are making.

Add a button in the home.page.html template to invoke alert checkbox options.
<ion-button size="small" (click)="presentAlertCheckbox()">Alert Checkbox Input</ion-button>Edit home.page.ts typescript to add alert checkbox options.
import { Component } from '@angular/core';
import { AlertController } from '@ionic/angular';

@Component({
  selector: 'app-home',
  templateUrl: 'home.page.html',
  styleUrls: ['home.page.scss'],
})
export class HomePage {

  constructor(private alertController: AlertController) { }

  async presentAlertCheckbox() {
    const alert = await this.alertController.create({
      cssClass: 'alert-checkbox',
      header: 'Select Framework',
      inputs: [
        {
          name: 'Angular',
          type: 'checkbox',
          label: 'Angular',
          value: 'angular',
          checked: true
        },

        {
          name: 'Ionic',
          type: 'checkbox',
          label: 'Ionic',
          value: 'value2'
        },
        {
          name: 'Flutter',
          type: 'checkbox',
          label: 'flutter',
          value: 'flutter'
        },

        {
          name: 'Vue',
          type: 'checkbox',
          label: 'Vue',
          value: 'vue'
        }
      ],
      buttons: [
        {
          text: 'Cancel',
          role: 'cancel',
          cssClass: 'secondary',
          handler: () => {
            console.log('Confirm Cancel');
          }
        }, {
          text: 'Ok',
          handler: () => {
            console.log('Confirm Ok');
          }
        }
      ]
    });

    await alert.present();
  }
}
Ionic alert with promise
We can also implement an alert with a promise instead of an async method. Let create an alert with a promise on our first basic alert promise.
presentAlert() {
this.alertController.create({
cssClass: 'basic-alert',
header: 'Alert Header',
subHeader: 'Alert Subtitle',
message: 'This is an alert message.',
buttons: ['OK']
}).then(res => {
res.present();
});
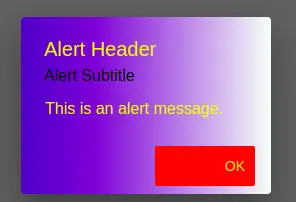
}Customizing Ionic alert style
Ionic alert controller property cssClass where we added our custom class name. With this custom CSS class, we can control the Ionic alert style like alert background, font color, height, and more, we need to add our alert style inside global.scss and this is because the ionic alert controller works at the root level.
Let’s add an Ionic alert with a class name using cssClass.
async presentAlert() {
  const alert = await this.alertController.create({
    cssClass: 'basic-alert',
    header: 'Alert Header',
    subHeader: 'Alert Subtitle',
    message: 'This is an alert message.',
    buttons: ['OK']
});

    await alert.present();
At the end of global.scss we need to add style for an alert.
......
.basic-alert {
    --backdrop-opacity: 0.6;
    --background: linear-gradient(90deg, rgb(30, 0, 201) 1%, rgb(248, 255, 248) 100%);
    .alert-title.sc-ion-alert-md, .alert-title.sc-ion-alert-ios {
        font-size: 16;
        color: yellow;
    }
    .alert-message.sc-ion-alert-md, .alert-message.sc-ion-alert-ios {
        color: yellow;
    }
    .alert-button.sc-ion-alert-md, .alert-button.sc-ion-alert-ios {
        color: yellow;
        background-color: red;
        width: 100px;
        border-radius: 2px;
    }
}
Conclusion
We have explored how we implement Ionic alerts in different ways. Alert can have an input type that allows us to add HTML input elements to collect data from users.