With the release of Ionic 5, we can create an Ionic application from different front-end frameworks. To implement Ionic routing and navigation, we are using Ionic angular routing methods. Ionic Angular application is (SPA) a single-page application, when we navigate between components/page we are not reloading the page, only changing the parts of content using component.
We need to add Ionic navigation to our application so it will change the content area of the page (known as the router outlet) based on the user’s actions. An angular router allows us to configure and implement such navigation without performing a full page reload.
In this tutorial, we’ll learn the major features of the Ionic Angular router, including configuring routes in parent and child components, how to pass data to routes using different approaches.
Setting up Ionic routing
Let’s first create an Ionic angular project to implement ionic routing. We also need to create a few pages to navigate between them. Routing uses URLs to manage the content displayed to the user.
ionic start myRoutingApp blank --type=angular
ionic generate page pages/about
ionic generate page pages/contact
By default when creating an Ionic project from a blank template we get the home page and to demonstrate routing we have to create two more pages in the pages folder. Is good practice to keep all pages in the pages folder and let move the home page to the pages folder.
Here is our routing configuration in the app.routing.ts file the Ionic router module is not a core Angular module and is an optional module.
import { NgModule } from '@angular/core';
import { PreloadAllModules, RouterModule, Routes } from '@angular/router';

const routes: Routes = [
  {
    path: 'home',
    loadChildren: () => import('./pages/home/home.module').then( m => m.HomePageModule)
  },
  {
    path: '',
    redirectTo: 'home',
    pathMatch: 'full'
  },
  {
    path: 'about',
    loadChildren: () => import('./pages/about/about.module').then( m => m.AboutPageModule)
  },
  {
    path: 'contact',
    loadChildren: () => import('./pages/contact/contact.module').then( m => m.ContactPageModule)
  },
];

@NgModule({
  imports: [
    RouterModule.forRoot(routes, { preloadingStrategy: PreloadAllModules })
  ],
  exports: [RouterModule]
})
export class AppRoutingModule { }
The next thing to do is to import RouterModule an optional module in the app.module.ts file and this is already done for use while creating the Ionic project.
In our app.component.ts file, we have a router-outlet component. The router-outlet is a directive that’s available from the @angular/router package and is used by the router to mark wherein a template, a matched component should be inserted. To implement routing we used routerLink property on ion-button property that bound to the page configured for the /home or /about or /contact path. The routerLink makes navigation between pages possible and matched components will be rendered in the area marked with
<router-outlet>this is defined inside the app.component.ts file. We can also use the router link property on an anchor tag, div, or span tag also. Edit home.page.html template.
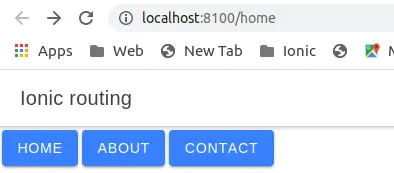
  <ion-button routerLink="/home">Home</ion-button>
  <ion-button routerLink="/about">About</ion-button>
  <ion-button routerLink="/contact">Contact</ion-button>
Here is a screenshot of our Ionic routing for the above three pages.
We have also added a square bracket on routerLink property like below this indicates routerLink with a square bracket is property binding.
  <ion-button [routerLink]="['/home']">Home</ion-button>
  <ion-button [routerLink]="['/about']">About</ion-button>
  <ion-button [routerLink]="['/contact']">Contact</ion-button>
How to apply a style to active route link
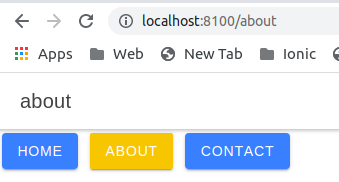
We can apply different styles to the active route and in our case, we have applied yellow background on the active button link. To apply style we need to add routerLinkActive directive on our link button as.
<ion-button [routerLink]="['/home']" routerLinkActive="active">
   Home
</ion-button>
<ion-button [routerLink]="['/about']" routerLinkActive="active">
  About
</ion-button>
<ion-button [routerLink]="['/contact']" routerLinkActive="active">
Contact
</ion-button
Once we add the routerLinkActive directive on a link, we can add style to the active link using the following CSS style.
  ion-button.active {
    --background: #f7c600;
    --border-radius: 2px;
  }
Here is a screenshot of our active link style example.
How to pass data in Ionic route
There are different ways we can pass data through Angular routing and we’ll learn each approach separately. It is important to know that the order of routing in the route array is very important. The ionic angular router uses a first match wins strategy for matching routes. We should design route arrays in a way such that more specific routes should be placed above less-specific routes. The following flow of design is advised:
- Routes with a static path
- Empty path route
- for the default route wildcard route
We can pass data in URL and also in other approaches, suppose we have /post URL and post with id like /post/id. In both cases, we are navigating to the post component. We have to configure our routing in the above rules and let edit routes array in app.routing.module.ts
const routes: Routes = [
  {
    path: 'home',
    loadChildren: () => import('./pages/home/home.module').then(m => m.HomePageModule)
  },
  { path: '', redirectTo: 'home', pathMatch: 'full' },
  {
    path: 'post/:id',
    loadChildren: () => import('./pages/post/post.module').then( m => m.PostPageModule)
  },
  {
    path: 'post',
    loadChildren: () => import('./pages/post/post.module').then( m => m.PostPageModule)
  },
  {
    path: 'about',
    loadChildren: () => import('./pages/about/about.module').then(m => m.AboutPageModule)
  },
  {
    path: 'contact',
    loadChildren: () => import('./pages/contact/contact.module').then(m => m.ContactPageModule)
  },
  {
    path: '**', loadChildren: () => import('./pages/home/home.module').then(m => m.HomePageModule)
  }
];
Using routerLink property binding to pass id param
Let first used routerLink property binding to pass id in our route URL. On our home page, we have a button with routerLink property with id and I have used static id as a number directly.
  <ion-button [routerLink]="['/post', 12]" routerLinkActive="active">
    Post
  </ion-button>
We can now see that we have a pass id of value in our post URL. The routerLink attribute is enclosed in square brackets, telling Angular that it should treat the attribute value as a data binding expression.
The expression is set out as an array, in our case we have two segments and it can contain more also, with each element containing the value for one segment. In our case, the first segments are literal strings that will be included in the target URL. The second segment will be evaluated to include the id value for a post page.
Now on our post page, we have to retrieve our id from the URL using activeRoute object and let edit the post.page.ts file as.
import { Component } from '@angular/core';
import { ActivatedRoute } from '@angular/router';

@Component({
  selector: 'app-post',
  templateUrl: './post.page.html',
  styleUrls: ['./post.page.scss'],
})
export class PostPage {
  id: number;

  constructor(private activeRoute: ActivatedRoute) {
    this.id = activeRoute.snapshot.params["id"];
   }
}
Using queryParams property to pass data param
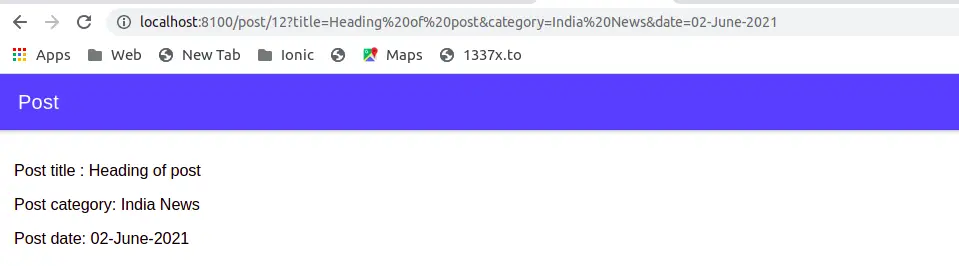
We can use the [queryParams] directive along with [routerLink] to pass query parameters in the URL. Let’s edit our routing button to pass query params as.
<ion-button [routerLink]="['/post', 12]"
  [queryParams]="{ title: 'Heading of post', category: 'India News', date: '02-June-2021'}">
    Post</ion-button>
We are passing objects containing title, category, and date in queryParams. On our post page, we have to read our params data as follows.
import { Component } from '@angular/core';
import { ActivatedRoute } from '@angular/router';

@Component({
  selector: 'app-post',
  templateUrl: './post.page.html',
  styleUrls: ['./post.page.scss'],
})
export class PostPage {

  post = { title: '', category: '', date: '' };
  constructor(private activeRoute: ActivatedRoute) {
    const id = activeRoute.snapshot.params['id'];
    this.activeRoute.queryParams.subscribe(params => {
      this.post.title = params['title'];
      this.post.category = params['category'];
      this.post.date = params['date'];
    });
  }
}
Like routerLink directive to allow ionic routing in a template and we can also use router object from angular route to navigate and pass param in URL also.
 this.router.navigate(['about/', 12]); // Route with path and id
 this.router.navigate(['/about'], {
    state: {
      title: 'Heading of Post'
      category: 'News',
      date: '02-June-2021'
    }
 });
Using route state to pass data
We can use route state objects to pass data to our navigating component. The state object is defined as a property of the NavigationExtras object passed as the second argument to the navigate or navigateByUrl of the router’s methods. On our home page, we want to transfer objects and strings as below.
goToAboutPage(): void {
this.router.navigate(['/about'], {
state: {
frontEnd: JSON.stringify({ framework: 'Ionic', version: '6' }),
site: 'edupala.com'
}
});
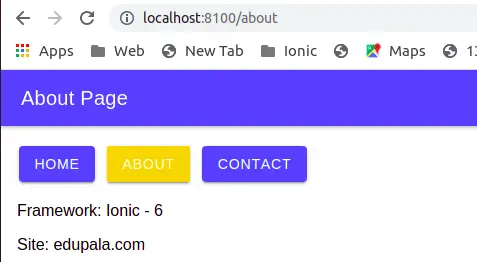
}Clicking on the about button in our home template allows us to transfer the following route state object. The state object didn’t display our date in the URL in a browser. Here is a screenshot of the state object we have used.
Reading data from the state object
Once we navigate successfully to our request page, in our case it is about page. We can read data from state objects using the getCurrentNavigation method we called extras to objects containing the state object. As our frontEnd is a JSON object we need to parse it to an object.
import { Component } from '@angular/core';
import { Router } from '@angular/router';

@Component({
  selector: 'app-about',
  templateUrl: './about.page.html',
  styleUrls: ['./about.page.scss'],
})
export class AboutPage {
  frontEnd: any;
  site: string;

  constructor(private router: Router) {
    if (this.router.getCurrentNavigation().extras.state) {
      const routeState = this.router.getCurrentNavigation().extras.state;
      if (routeState) {
        this.frontEnd = routeState.frontEnd ? JSON.parse(routeState.frontEnd) : '';
        this.site = routeState.site ? routeState.site : '';
      }
    }
  }
}
Now in our about.page.html template, we can read our data as follows.
  <div>
    <p *ngIf="frontEnd">
     Framework: {{ frontEnd.framework }} - {{ frontEnd.version }}
    </p>
    <p *ngIf="site">Site: {{ site }} </p>
  </div>
Using NavigationExtras interface to pass data via the navigation.
We can use the NavigationExtras interface within the router module to set the state object as
// Send Parameter
import { NavController } from '@ionic/angular';
import { NavigationExtras } from '@angular/router';
//...
constructor(public navCtrl: NavController) { }
//...
let navigationExtras: NavigationExtras = {
    queryParams: {
        currency: JSON.stringify(currency),
        refresh: refresh
    }
};
this.navCtrl.navigateForward(['page-slug'], true, navigationExtras);
At Component B we can receive state data as
// Receive Parameter
import { ActivatedRoute } from "@angular/router";
//...
constructor(private route: ActivatedRoute) {}
//...
this.route.queryParams.subscribe(params => {
    this.refresh = params["refresh"];
    this.currency = JSON.parse(params["currency"]);
});Conclusion
In this article, we have discussed how we can configure and implement Ionic angular routing and its importance to routing order. At last, we discuss different approaches to passing data in Ionic angular routing.
Related posts
Wow, wonderful blog layout! How long have you been blogging for?
you made blogging look easy. The overall look of your website is fantastic, let alone the content!
wow i love it…. thanks guys and more over see below ionic development company
Excellent, what a webpage it is! This blog gives useful data to
us, keep it up.