In most cases when we are developing web or apps, we need to show loading to indicate progress or something is happening. Especially when we are retrieving data or POST data to a server. Ionic loading will block the user from interacting with applications and increase the probability that the user will wait and use our app instead of leaving and searching for some alternatives.
Ionic has lots of pre-built components, which we can ready to use like action-sheet, loading, toast controller, and more like Ionic loading component.
In this article, we’ll learn how to use an Ionic loading controller and how we can easily customize an Ionic loading style. At last, we will create an ionic loading service, which allows us to share loading code among our pages.
Prerequisites:
To create and run an Ionic project, We need Node js and Ionic CLI already install in our system, if not then check how to install Node js and Ionic in Ubuntu. Ionic CLI allows us to create an Ionic project, generate application and library code, and perform a variety of ongoing development tasks such as testing, bundling, and deployment. To install the Ionic CLI, open a terminal, and run the following command:
npm install -g @ionic/cliSetting up and configure an Ionic Loading project
With the release of ionic version 4, the Ionic framework is no longer limited to angular, we can create the ionic projects in different front-end frameworks like Angular, Vue, and React. Let’s first create a blank Ionic 5 Angular project. To demonstrate Ionic loading we’ll retrieve our data from real-time free API from darksky.net.
ionic start loadingApps blank --type=angularSimple Ionic loading example
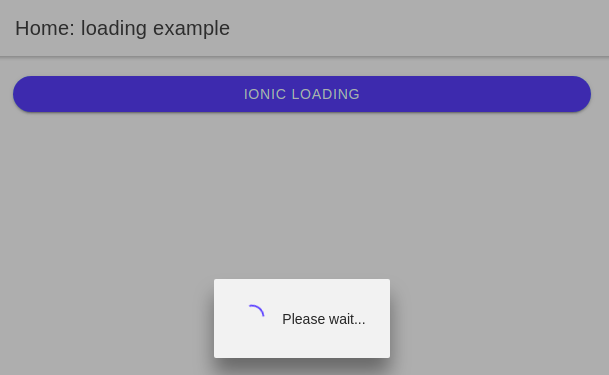
In our first loading example, we have demonstrated and called ionic loading by clicking on a button. In a real application, we used ionic loading whenever we call to remote API and until data is not received by the user. The loading makes a good user interface and it indicates data is retrieved from a remote server. Here is a screenshot of our first simple example of a loading controller.
Let edit the home.page.ts file to add and inject an ionic loading controller in our constructor.
import { Component } from '@angular/core';
import { LoadingController } from '@ionic/angular';

@Component({
  selector: 'app-home',
  templateUrl: 'home.page.html',
  styleUrls: ['home.page.scss'],
})
export class HomePage {

  constructor(private loadingCtrl: LoadingController) {
  }

  async presentLoading() {
    const loading = await this.loadingCtrl.create({
      cssClass: 'my-custom-class',
      message: 'Please wait...',
      duration: 2000
    });
    await loading.present();

    await loading.onDidDismiss();
    console.log('Loading dismissed!');
  }
}
In our home.page.html template add an ionic button to invoke the loading controller method.
  <ion-button (click)="presentLoading()" expand="block" shape="round">
    Ionic loading
  </ion-button>
Import HttpClientModule to call HTTP GET method to demontrate loading for remote data
We need to import HttpClientModule in our app.module.ts as we retrieve our data from darksky.net free API for weather information. You need to create an account on darksky.net and need API or you can use your own API for data. Let’s add HttpClientModule in the app.module.ts file
import { NgModule } from '@angular/core';
import { BrowserModule } from '@angular/platform-browser';
import { RouteReuseStrategy } from '@angular/router';
import { IonicModule, IonicRouteStrategy } from '@ionic/angular';
import { SplashScreen } from '@ionic-native/splash-screen/ngx';
import { StatusBar } from '@ionic-native/status-bar/ngx';
import { AppComponent } from './app.component';
import { AppRoutingModule } from './app-routing.module';
import { HttpClientModule } from '@angular/common/http';
@NgModule({
declarations: [AppComponent],
entryComponents: [],
imports: [
BrowserModule,
IonicModule.forRoot(),
AppRoutingModule,
HttpClientModule,
],
providers: [
StatusBar,
SplashScreen,
{ provide: RouteReuseStrategy, useClass: IonicRouteStrategy }
],
bootstrap: [AppComponent]
})
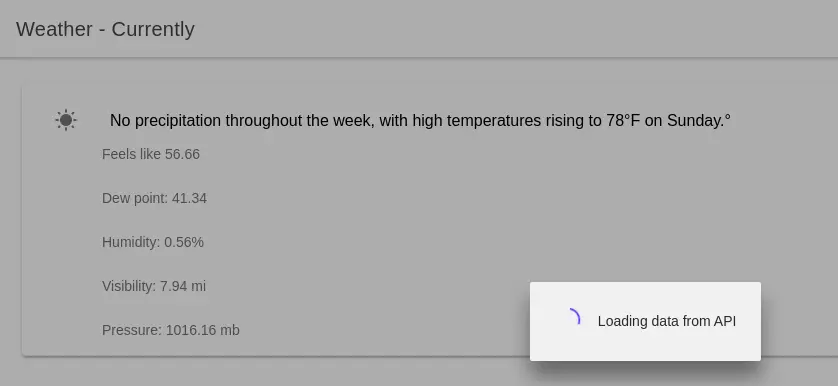
export class AppModule { }We’ll demonstrate here’s a quick screenshot of what we’ll be building.
How to use Ionic loading controller directly into a single page ?
If our application use only one Ionic loading controller, then we can add the Ionic loading component directly to the consumer page. Get API from draksky, you need to signup for https://darksky.net/ to get weather information. Once you login you will get API. Edit the following code in the home.page.html template and home.page.ts file to add the Ionic loading controller.
<ion-header>
  <ion-toolbar color="primary">
    <ion-title>
      Ionic Loading - Weather - Currently
    </ion-title>
  </ion-toolbar>
</ion-header>

<ion-content class="ion-padding">
  <div *ngIf="weatherResult" class="ion-padding">
    <ion-card>
      <ion-card-content>
        <ion-item class="activated" lines="none">
          <ion-icon name="{{ summaryIcon }}" slot="start"></ion-icon>
          <ion-label>{{ weatherData.daily.summary }}°</ion-label>
        </ion-item>
        <div class="currentInfo">
          <p>Feels like {{ currentWeather.temperature }}</p><br>
          <p>Dew point: {{ currentWeather.dewPoint }}</p><br>
          <p>Humidity: {{ currentWeather.humidity }}%</p><br>
          <p>Visibility: {{ currentWeather.visibility }} mi</p><br>
          <p>Pressure: {{ currentWeather.pressure }} mb</p>
        </div>
      </ion-card-content>
    </ion-card>
  </div>
</ion-content>
We also need to copy and paste the API from https://darksky.net/dev in our home.page.ts file. I have noticed that when we are using the loading component in our project, loading dismiss is called before ionic loading presents, which will show continued loading even if we got an API response.
The solution is we need to add place loading present code below our loading dismiss code, as shown here. Add the following code in the home.page.ts file
import { HttpClient } from '@angular/common/http';
import { Component } from '@angular/core';
import { LoadingController } from '@ionic/angular';

@Component({
  selector: 'app-home',
  templateUrl: 'home.page.html',
  styleUrls: ['home.page.scss'],
})
export class HomePage {
  currentWeather: any;
  weatherData: any;
  summaryIcon: string;
  weatherResult = false;

  constructor(
    private http: HttpClient,
    private loadingController: LoadingController) { }

  async ionViewWillEnter() {
    const loading = await this.loadingController.create({
      message: 'Loading data from darksky API'
    });


    this.http.get('https://cors-anywhere.herokuapp.com/https://api.darksky.net/
        forecast/YOUR-API/37.8267,-122.4233')
      .subscribe(async (weatherData: any) => {
        this.weatherResult = true;

        this.weatherData = weatherData;
        this.currentWeather = weatherData.currently;
        if (this.currentWeather.summary.toLowerCase() === 'cloudy') {
          this.summaryIcon = 'cloudy';
        } else if (this.currentWeather.summary.toLowerCase() === 'rainy') {
          this.summaryIcon = 'rainy';
        } else if (this.currentWeather.summary.toLowerCase() === 'clear') {
          this.summaryIcon = 'sunny';
        } else if (this.currentWeather.summary.toLowerCase() === 'thunderstorm') {
          this.summaryIcon = 'thunderstorm';
        }
        loading.dismiss();
      });
    loading.present();
  }
}
The loading creates method will create Ionic loading, present the method the loading overlay after it has been created, and once API data is retrieved we need to dismiss the loading using the dismiss method.
Ionic loading service, is shareable to all components.
We have two-step 4 if we want to use the ionic loading controllers at many places in our project. Then it is best to use a loading service, as this will reduce overall code. Here I will create a common service and this file where we’ll add the common code of the ionic loader.
Here I will need to create a common-service.ts file where I will add the code of the ionic loader. We don’t have to include our common service in the app.module.ts provider as we have set injectable as the root level. Running the below command will create a common service in the services folder.
ionic generate service services/commonEdit services/common-service.ts file adds the following code and we have two sharable methods one for creating and the other for dismissing the Ionic loading controller.
import { Injectable } from '@angular/core';
import { LoadingController } from '@ionic/angular';

@Injectable({ providedIn: 'root' })
export class CommonProvider {

    constructor(private loadingController: LoadingController) { }

    async loadingPresent(message: string = null, duration: number = null) {
        const loading = await this.loadingController.create({ message, duration });
        return await loading.present();
    }

    async loadingDismiss() {
        setTimeout(() => {
            return this.loadingController.dismiss();
        }, 1000);
    }

}
Once we have the Ionic loading service, we can inject the loading service to all consumer pages. Add the following code in the home.page.ts file and you can add it to any number of pages.
import { HttpClient } from '@angular/common/http';
import { Component, OnInit } from '@angular/core';;
import { CommonService } from '../services/common.service';

@Component({
  selector: 'app-home',
  templateUrl: 'home.page.html',
  styleUrls: ['home.page.scss'],
})
export class HomePage implements OnInit {
  currentWeather: any;
  weatherData: any;
  summaryIcon: string;
  weatherResult = false;

  constructor(private http: HttpClient, private common: CommonService) { }

  async ngOnInit() {
    // tslint:disable-next-line: max-line-length
    this.http.get('https://cors-anywhere.herokuapp.com/https://api.darksky.net/forecast/12fa7c61deeb049e884d204f6eb2b79f/37.8267,-122.4233')
      .subscribe(async (weatherData: any) => {
        this.weatherResult = true;
        this.weatherData = weatherData;
        this.currentWeather = weatherData.currently;
        if (this.currentWeather.summary.toLowerCase() === 'cloudy') {
          this.summaryIcon = 'cloudy';
        } else if (this.currentWeather.summary.toLowerCase() === 'rainy') {
          this.summaryIcon = 'rainy';
        } else if (this.currentWeather.summary.toLowerCase() === 'clear') {
          this.summaryIcon = 'sunny';
        } else if (this.currentWeather.summary.toLowerCase() === 'thunderstorm') {
          this.summaryIcon = 'thunderstorm';
        }
        this.common.dismissLoading();
      });
    this.common.createLoading('Loading from Loading service');
  }
}
How to Customize Ionic loading style ?
In our first example, we can set loading options, it has a property called cssClass where we added our custom class name called home-loading. With this custom CSS class, we can control the Ionic loading style like ionic loading background color, ionic loading text color, and more, we need to add our loading style inside global.scss and this is because the Ionic loading controller works at the root level.

Ionic loading properties
When creating an Ionic loading using the create() method, we can pass an object to configure the Ionic Loading. The following configuration properties are supported by Ionic loading options.
| Properties | Description |
| cssClass | Name of custom CSS classes where we apply style for loading. We can have multiple classes provided they should be separated by spaces. |
| message | Optional text content to display in the loading indicator. |
| backdropDismiss | By default is false and if true a user can tap on the screen to hide the Ionic loader by himself. |
| animated | If true, the loading indicator will animate. |
| mode | The mode determines which platform styles to use. |
| duration | A number of milliseconds to wait before dismissing the loading indicator. |
| enterAnimation | Animation to use when the loading indicator is presented. |
| leaveAnimation | Animation to use when the loading indicator is dismissed. |
| showBackdrop | If true, a backdrop will be displayed behind the loading indicator. |
| spinner | The name of the spinner to display. |
| translucent | If true, the loading indicator will be translucent. Only applies when the mode is “ios” and the device supports backdrop-filter. |
How to used Ionic loading with promise ?
We can also use promise instead of async to create loading. Below is an example loading will dismiss after 5 seconds using the Ionic duration attribute of Ionic modal options.
loaderPromise() {
    this.loadingController.create({
      message: 'Loading will hide in 5 Seconds',
      duration: 5000
    }).then((res) => {
      res.present();

      res.onDidDismiss().then((dis) => {
        console.log('Loading dismissed, after 5 Seconds', dis);
      });
    });
}
Creating our own Ionic loading spinner image
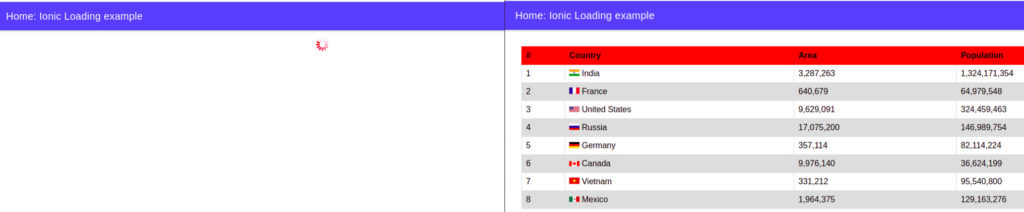
We can create our own custom ionic loading spinner image without using an Ionic loading controller. In our example, we have used a gif image and you can use a gif image of your choice. We show our custom loading image only when our data is not retrieved and loading is controlled by using the isDataLoaded boolean variable. We have used ngIf and ng-template directives to check if isDataLoaded true and false logic.
Let’s edit the home.page.ts file we used some dummy data instead of real API to demonstrate Ionic loading logic.
import { Component, OnInit } from '@angular/core';
import { HttpClient } from '@angular/common/http';

@Component({
  selector: 'app-home',
  templateUrl: 'home.page.html',
  styleUrls: ['home.page.scss'],
})
export class HomePage implements OnInit {
  countries: any;
  isDataLoaded = false;

  constructor(private http: HttpClient) { }

  ngOnInit(): void {
    setTimeout(() => {
      this.http.get('./assets/data/countries.json').subscribe((data: any[]) => {
        this.countries = data;
        this.isDataLoaded = true;
      });
    }, 2000);
  }
}
In our home.page.html template we have ngIf directive, show our custom Ionic loading spinner gif image only when isDataLoaded is false and hide when we got our actual data by setting isDataLoaded to true.
<ion-header>
  <ion-toolbar color="primary">
    <ion-title>Home: Ionic Loading example</ion-title>
  </ion-toolbar>
</ion-header>
<ion-content class="ion-padding">

  <div *ngIf="isDataLoaded; else dataNotLoaded">
    <table class="table table-striped ion-margin">
      <thead>
        <tr>
          <th scope="col">#</th>
          <th scope="col">Country</th>
          <th scope="col">Area</th>
          <th scope="col">Population</th>
        </tr>
      </thead>
      <tbody>
        <tr *ngFor="let country of countries index as i">
          <td scope="row">{{ i + 1 }}</td>
          <td>
            <img [src]="'https://upload.wikimedia.org/wikipedia/commons/' + country.flag" class="mr-2"
              style="width: 20px">
            {{ country.name }}
          </td>
          <td>{{ country.area | number }}</td>
          <td>{{ country.population | number }}</td>
        </tr>
      </tbody>
    </table>
  </div>

  <ng-template #dataNotLoaded>
    <div class="ion-text-center">
      <img src="assets/images/spinner.gif">
    </div>
  </ng-template>
</ion-content>
Conclusion
We can easily create loading in Ionic using the Ionic loading component. We have demonstrated how to use Ionic loading using two methods and we can easily custom loading style using cssClass property of loading options.
Related posts