The JSON is an abbreviation for JavaScript Object Notation, in other words, a notation that makes use of JavaScript objects. In Angular JSON is used everywhere. We are going to learn how to read Angular JSON files.
Practically all other programming languages can handle JSON strings. As a result, JSON is an excellent format for exchanging data between (server and client), different languages, and platforms. In this tutorial, we’ll learn how JSON is used in Angular.
The JSON is much smaller than XML, more flexible, and easier to read. The JSON is based on the structure of JavaScript objects but is language-independent and can be used to transfer data among all manner of programming languages.
We can’t send functions with JSON, and the following are data types we can send with JSON.
- Objects
- Booleans
- Arrays
- Strings
- Numbers
- The value null
In this tutorial we will learn the different ways of reading JSON data in Angular project. Second we will learn how to apply and example of Angular JSON pipe.
Prerequisites:
To create and run an Angular project, We need node js and Angular CLI already install in our system, if not then check how to install node js and angular in Ubuntu. To install the Angular CLI, open a terminal and run the following command:
npm install -g @angular/cliMethod 1: Angular read JSON file
There are different methods we can use to Angular read JSON files. The Fetch API provides an interface for fetching resources local or remote across the network and fetch API provides a more powerful and flexible feature set. Let’s first create an Angular JSON project using the Angular CLI command.
ng new JSONAppsWe’ll demonstrate here’s a quick screenshot of what we’ll be building.
Add JSON file to read using Fetch API
Let’s create a folder called data in assets and add a file called the employees.json file. Add the following data to the Angular JSON file, so that we can read this static JSON data.
[
    {"name":"Ram", "company":"Google"},
    {"name":"Bob", "company":"EMC"},
    {"name":"Ram", "company":"Google"},
    {"name":"Bob", "company":"EMC"},
    {"name":"Ram", "company":"Google"},
    {"name":"Bob", "company":"EMC"}
]
Edit app.component component
We had to use Javascript fetch API to retrieve our static JSON file. The fetch function takes one mandatory argument, we need to provide a path to the resource you want to retrieve. Fetch API can return a promise that resolves to the Response to that request, whether it is successful or not.
import { Component, OnInit } from '@angular/core';

@Component({
  selector: 'app-root',
  templateUrl: './app.component.html',
  styleUrls: ['./app.component.scss']
})
export class AppComponent implements OnInit {
  title = 'Angular JSON Fetching';
  employees: any;

  constructor() { }

  ngOnInit(): void {
    fetch('./assets/data/employees.json').then(res => res.json())
    .then(json => {
      this.employees = json;
    });
  }
}
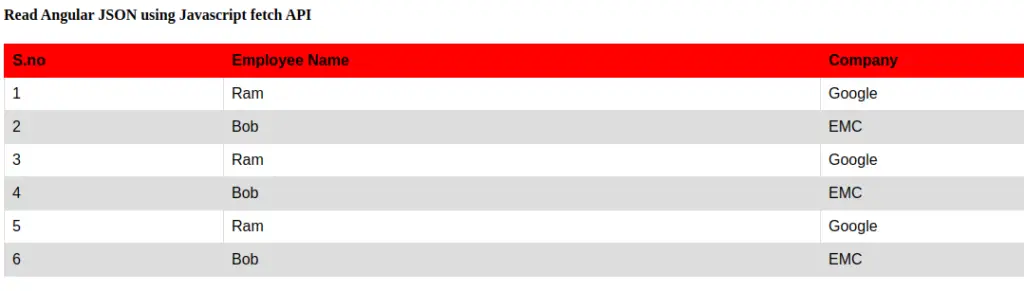
Let’s edit the app. component template file to display our JSON data in table form. It’s an option if you want to know how to make a table in an Angular Check our previous articles.
<h4>Read Angular JSON using Javascript fetch API</h4>
<table class="table table-striped">
  <thead>
    <tr>
      <th scope="col">S.no</th>
      <th scope="col">Employee Name</th>
      <th scope="col">Company</th>
    </tr>
  </thead>
  <tbody>
    <tr *ngFor="let item of employees; index as i">
      <td scope="row">{{ i + 1 }}</td>
      <td>{{ item.name }}</td>
      <td>{{ item.company }}</td>
    </tr>
  </tbody>
</table>

<router-outlet></router-outlet>
Method 2: Angular read JSON file using HttpClient module
Most front-end applications used HTTP protocol to communicate with the server. Angular provides a simplified client HTTP API for Angular applications, we can use the HttpClient service class from @angular/common/HTTP to read Angular JSON files. We’ll create a service to retrieve the JSON files with rxjs Observable.
We’ll demonstrate here’s a quick screenshot of what we’ll be building.
Setting up and configure Angular reading JSON file using HttpClient
Let’s create a folder called data in assets and add a file called countries.json file. Add the following data to the Angular JSON file, so that we can retrieve this static JSON data using Angular HttpClient API.
[
    {
      "name": "Russia",
      "flag": "f/f3/Flag_of_Russia.svg",
      "area": 17075200,
      "population": 146989754
    },
    {
      "name": "France",
      "flag": "c/c3/Flag_of_France.svg",
      "area": 640679,
      "population": 64979548
    },
    {
      "name": "Germany",
      "flag": "b/ba/Flag_of_Germany.svg",
      "area": 357114,
      "population": 82114224
    },
    {
      "name": "Canada",
      "flag": "c/cf/Flag_of_Canada.svg",
      "area": 9976140,
      "population": 36624199
    },
    {
      "name": "Vietnam",
      "flag": "2/21/Flag_of_Vietnam.svg",
      "area": 331212,
      "population": 95540800
    },
    {
      "name": "Mexico",
      "flag": "f/fc/Flag_of_Mexico.svg",
      "area": 1964375,
      "population": 129163276
    },
    {
      "name": "United States",
      "flag": "a/a4/Flag_of_the_United_States.svg",
      "area": 9629091,
      "population": 324459463
    },
    {
      "name": "India",
      "flag": "4/41/Flag_of_India.svg",
      "area": 3287263,
      "population": 1324171354
    }
]
We need a country interface, since Angular uses typescript, and we need to have strong typing. To use country’s data we have a country interface, let’s create a folder model and add a country.ts file.
export interface Country {
    name: string;
    flag: string;
    area: number;
    population: number;
}
We need to import HttpClientModule in the app.module.ts file to use HttpClient API.
import { BrowserModule } from '@angular/platform-browser';
import { NgModule } from '@angular/core';
import { AppRoutingModule } from './app-routing.module';
import { AppComponent } from './app.component';
import { HttpClientModule } from '@angular/common/http';

@NgModule({
  declarations: [
    AppComponent
  ],
  imports: [
    BrowserModule,
    AppRoutingModule,
    HttpClientModule
  ],
  providers: [],
  bootstrap: [AppComponent]
})
export class AppModule { }
Let’s create a Service called countries. Angular service allows us to manage data state, allow sharing of data in our application, and (retrieve and send) data between application and server. Command to create Angular service.
ng new service services/countriesEdit the countries.service.t file to retrieve our static JSON file.
import { HttpClient } from '@angular/common/http';
import { Injectable } from '@angular/core';
import { Observable } from 'rxjs';
import { Country } from '../models/country';

@Injectable({ providedIn: 'root' })
export class CountriesService {

  constructor(private http: HttpClient) { }

  getCountries(): Observable<Country[]> {
    return this.http.get<Country[]>('./assets/data/countries.json');
  }
}
In the app.component.ts file, we need to import CountriesService as a dependency of the component, and let’s edit the app.component.ts file.
import { Component, OnInit } from '@angular/core';
import { Country } from './models/country';
import { CountriesService } from './services/countries.service';
@Component({
selector: 'app-root',
templateUrl: './app.component.html',
styleUrls: ['./app.component.scss']
})
export class AppComponent implements OnInit {
title = 'Angular JSON Fetching';
// employees: any;
countries: Country[];
// objData = { name: 'Edupala.com', created: '2016', on: 'Tutorial on JS|Ionic|Angular' };
constructor(private countriesService: CountriesService) { }
ngOnInit(): void {
this.countriesService.getCountries().subscribe((data: Country[]) => {
this.countries = data;
});
}
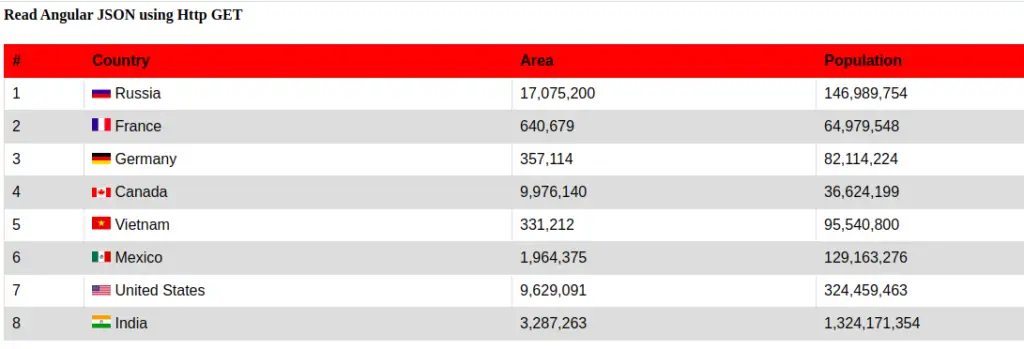
}We will display our country’s data in the app component template using an HTML native table.
<h4>Read Angular JSON using Http GET</h4>
<table class="table table-striped">
  <thead>
    <tr>
      <th scope="col">#</th>
      <th scope="col">Country</th>
      <th scope="col">Area</th>
      <th scope="col">Population</th>
    </tr>
  </thead>
  <tbody>
    <tr *ngFor="let country of countries index as i">
      <td scope="row">{{ i + 1 }}</td>
      <td>
        <img [src]="'https://upload.wikimedia.org/wikipedia/commons/' + country.flag" class="mr-2" style="width: 20px">
        {{ country.name }}
      </td>
      <td>{{ country.area | number }}</td>
      <td>{{ country.population | number }}</td>
    </tr>
  </tbody>
</table>
Angular JSON pipe: Serializing Data as JSON
Angular JSON pipe is mostly useful for debugging and this pipe creates a JSON representation of a data value. No arguments are accepted by this pipe, which uses the browser’s JSON.stringify method to create the JSON string. Allows you to convert a JavaScript object into a JSON string.
Syntax of Angular JSON pipe
{{ json_expression | json }}
For an example of an Angular JSON pipe, we will demonstrate JSON data with and without an Angular JSON pipe.
import { Component, OnInit } from '@angular/core';
import { Country } from './models/country';
import { CountriesService } from './services/countries.service';

@Component({
  selector: 'app-root',
  templateUrl: './app.component.html',
  styleUrls: ['./app.component.scss']
})
export class AppComponent implements OnInit {
  objData = { name: 'Edupala.com', created: '2016', on: 'Tutorial on JS|Ionic|Angular' };
}
<div>
<p>Without JSON pipe:</p>
<pre>{{ objData }}</pre>
</div>
<br />
<div>
<p>With JSON pipe:</p>
<pre>{{ objData | json}}</pre>
</div>Conclusion
We have explored and demonstrated an example of how to display and read Angular JSON files using fetch and HttpClient API of Angular. We have also learned the Angular JSON pipe.
Related Articles