React Navigation is a navigation library for React Native that makes it easy to manage the navigation between screens in your app. We can use the React Native Navigation Stack to navigate and pass data between different screens. We can use other navigation structures for our application needs like as follows.
- Navigation Stack is commonly used in our application, allowing you to push and pop screens onto a stack.
- Tab navigation provides switching between different tabs
- Drawer navigation provides a list of navigation on the side menu.
Here are our main objectives of the React Native Navigation Stack tutorial,
- Navigate between different Screen using @react-navigation/native
- Passing data like id with navigation and retrieving it from navigation params
- Configuring Stack navigation options
Table of Contents
React Native Navigation Stack
First, we need to install all the required libraries for navigation and we need to install the following dependency library libraries.
npm install @react-navigation/native
npx expo install react-native-screens react-native-safe-area-context
npm install @react-navigation/stack
npx expo install react-native-gesture-handler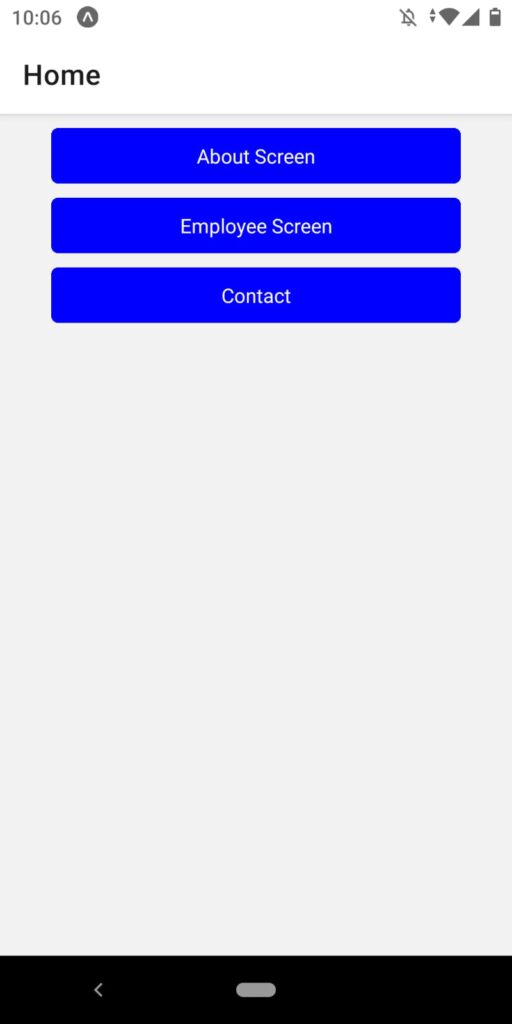
Once the installation is finished, let’s implement or configure navigation in ‘App.js’. For our example, we will create four screens: Home, About, Employees, and Contact. Let’s add navigation configuration in App.js
import { NavigationContainer } from "@react-navigation/native";
import { createStackNavigator } from '@react-navigation/stack';
import HomeScreen from "./screens/HomeScreen";
import AboutScreen from "./screens/AboutScreen";
import EmployeeScreen from "./screens/EmployeeScreen";
import ContactScreen from "./screens/ContactScreen";

const Stack = createStackNavigator();

const customTransitionSpec = {
  animation: "timing",
  config: {
    duration: 500,
  },
};

export default function App() {
  return (
    <NavigationContainer>
      <Stack.Navigator initialRouteName="Home">
        <Stack.Screen
          name="Home"
          component={HomeScreen}
          options={{
            // headerShown: false,
            title: "Home title",
            headerStyle: { backgroundColor: "#f4511e" },
            contentStyle: { backgroundColor: "#bdbebd" }, // Different style option
            headerTitleStyle: {
              fontWeight: "bold",
            },
            headerTintColor: "white", //Title font color
          }}
        />
        <Stack.Screen
          name="About"
          component={AboutScreen}
          options={{
            transitionSpec: {
              open: customTransitionSpec,
              close: customTransitionSpec,
            },
          }}
        />
        <Stack.Screen name="Employee" component={EmployeeScreen} />
        <Stack.Screen name="Contact" component={ContactScreen} />
      </Stack.Navigator>
    </NavigationContainer>
  );
}
The name property of the Stack.Navigator is used as a label to navigate to different screens and should be unique. We set the Home Screen as the default Screen by the initialRouteName property.
React Native Navigation Stack example
Let’s create homeScreen.jsx inside the screens folder, in this file, we will navigate to different screens and also demonstrate how to pass data via navigation. In the code below we can see that homeScreen component had two props route and navigation from react-navigation, All the components that are registered under React NavigationContainer will get these two props. We can use navigation props to navigate to different screens and pass a value like id along with navigation.
import { StyleSheet, FlatList, TouchableOpacity, Text } from "react-native";
import React from "react";

const HomeScreen = ({ route, navigation }) => {
  const buttons = [
    {
      text: "About Screen",
      onPress: () => navigation.navigate("About"),
    },
    {
      text: "Employee Screen",
      onPress: () =>
        navigation.navigate("Employee", {
          id: "2",
        }),
    },
    {
      text: "Contact",
      onPress: () => navigation.navigate("Contact"),
    },
  ];

  return (
    <FlatList
      data={buttons}
      renderItem={({ item }) => (
        <TouchableOpacity onPress={item.onPress} style={styles.button}>
          <Text style={[styles.text, { textAlign: "center" }]}>
            {item.text}
          </Text>
        </TouchableOpacity>
      )}
    />
  );
};

export default HomeScreen;

const styles = StyleSheet.create({
  button: {
    alignSelf: "center",
    backgroundColor: "blue",
    marginTop: 10,
    padding: 10,
    width: "80%",
    borderRadius: 5,
    alignContent: "center",
  },
  text: {
    color: "white",
  },
});
The route prop contains information about the current route, such as the key, name, and any parameters that were passed to it. It allows you to access and manipulate the current route’s data. Use route props to navigate back to where it was called.
const { name, params } = route;

  // Do something with the route information.

  const goBack = () => navigation.goBack();
We can also pass optional objects as a second parameter in the navigation function. The navigation props
const SomeScreen = ({ navigation }) => {

navigation.navigate("BookScreen", {
        id: itemData.item.id,
  });
The navigation prop provides methods and navigation-related properties to navigate between screens and interact with the navigation stack. It allows you to perform actions like pushing a new screen, popping the current screen, or resetting the navigation stack.
The navigation prop:
We can use navigation props to perform the following activities
- Subscribe to navigation events:
navigation.addListener('didFocus', () => { // Do something when the screen is focused }) - Go back:
navigation.goBack() - Navigate to another screen:
navigation.navigate('screenName') - Get the current screen’s route:
navigation.state.routeName - Set the current screen’s params:
navigation.setParams({ paramName: paramValue })
We have demonstrated two react-native navigation examples, first to navigate to a screen like about and contact screen and second to pass an ID or object to the screen.
How to retrieve data from the React native navigation stack
In the home screen we have an example to navigate to EmployeeScreen and pass ID along with it, Let’s now retrieve params from the route. Let’s add code in EmployeesScreen.jsx
import { StyleSheet, Text, View } from "react-native";
import React from "react";

const EmployeeScreen = ({ route, navigation }) => {
  const id = route.params.id;

  return (
    <View>
      <Text>Employee Id : {id}</Text>
    </View>
  );
};

export default EmployeeScreen;

const styles = StyleSheet.create({});
There are two ways we can retrieve data from navigation routes, based on different situations. In the first situation, if the screen component is registered under the Stack.Navigator container, We can use route props like navigation props as above.
Case 2: Where a component or screen is not registered under the StackNavigator container and in a nested component, then we have to use a second approach. To get current route information about the loaded route, then we can use useRoute hooks from react-navigation/native library.
import { useRoute } from "@react-navigation/native";
....

  const route = useRoute();
  route.params;
React Native Navigation Stack custom
The React native navigation stack provides options props that allow us to customize the component style and behavior. A Screen component accepts options prop which is either an object or a function that returns an object, that contains various configuration options Using options props we can specify options for each screen in the navigator, such as title, header style, gestures, etc.

Here we demonstrate how to change the HomeScreen title, title style, and background of the screen using options props as in the app.js file as follows
import { NavigationContainer } from "@react-navigation/native";
import { createNativeStackNavigator } from "@react-navigation/native-stack";
...

const Stack = createNativeStackNavigator();

const customTransitionSpec = {
  animation: "timing",
  config: {
    duration: 500,
  },
};

export default function App() {
  return (
    <NavigationContainer>
      <Stack.Navigator initialRouteName="Home">
        <Stack.Screen
          name="Home"
          component={HomeScreen}
          options={{
            // headerShown: false,
            title: "Home title",
            headerStyle: { backgroundColor: "#f4511e" }, // header bg color
            contentStyle: { backgroundColor: "#bdbebd" }, // Different background color
            headerTitleStyle: {
              fontWeight: "bold",
            },
            headerTintColor: "white", //Title font color
          }}
        />
        <Stack.Screen
          name="About"
          component={AboutScreen}
          options={{
            transitionSpec: {
              open: customTransitionSpec,
              close: customTransitionSpec,
            },
          }}
        />
        <Stack.Screen name="Employee" component={EmployeeScreen} />
        <Stack.Screen name="Contact" component={ContactScreen} />
      </Stack.Navigator>
    </NavigationContainer>
  );
}
contentStyle: { backgroundColor: "#F2F25" }The contentStyle property of options will overwrite what background color we applied in the app.json file, and we can also apply or set different styles using contentStyle property.
Avoid multiple options property on Stack.Navigator
The above options configuration is only for HomeScreen, if we want to apply it to other screens, then we have to apply it on all configurations of the Stack. Screen component. React native navigation also allows us to set default setting options, instead of applying individual, we can grab the option that should be applied to all screens through the screenOptions property on Stack.Navigator, as it is the parent component of all stack screen components.
      <NavigationContainer>
        <Stack.Navigator
          screenOptions={{
            headerStyle: { backgroundColor: "#f4511e" },
            contentStyle: { backgroundColor: "#bdbebd" }, // Different style option
            headerTitleStyle: {
              fontWeight: "bold",
            },
            headerTintColor: "white",
          }}
        >
          <Stack.Screen>
Setting Dynamic params in the Title
There are a couple of ways to set dynamic value to options, We can use options to pass dynamic value like ID or any other dynamic value and get information about particular information like student, and category type.
Options 1: In navigation configuration in App.js or custom component
The Stack.Screen we can also pass the arrow function, this function is executed by React Native and it receives an object with two pieces of data from React navigation. This function is automatically executed when the screen gets active. This function will return the options object, from the route property we can get params from the current route and we can set a dynamic value on the options object as below.
      <NavigationContainer>
        <Stack.Navigator
          screenOptions={{
            headerStyle: { backgroundColor: "#f4511e" },
            contentStyle: { backgroundColor: "#bdbebd" }, // Different style option
            headerTitleStyle: {
              fontWeight: "bold",
            },
            headerTintColor: "white",
          }}
        >
          <Stack.Screen ....
          <Stack.Screen
            name="SomeScreen"
            component={SomeScreen}
            options={({ route, navigation }) => {
              const studentId = route.params.studentId;
              return {
                title: studentId,
              }
            }}
          />
        </Stack.Navigator>
      </NavigationContainer>
In the navigated Screen we can extract studentId from params get particular student information and set the title based on current student information.
Options 2: Using navigation props
This option is used for components that are registered as Screen components in the React navigation configuration. Where we can get route and navigation as props from React Navigation. The navigation prop has many methods like navigate, setOptions, and more. We can use setOptions methods to set dynamic options, where we can set all configuration properties of the options object.
We need to set this value inside useLayoutEffect from react, without using this hook will generate a warning. We can use useEffect to avoid the warning, but using useEffect will not cause a smooth Title animation on the Component screen, as values are set after the screen has been loaded.
import { StyleSheet, FlatList, View } from "react-native";
import { useLayoutEffect } from "react";

const SomeScreen = ({ route, navigation }) => {
  const id = route.params.id;

  useLayoutEffect(() => {
    // title = extract data like title using id
    navigation.setOptions({
      title: title,
    });
  }, [id, navigation]);

  return (
    <View style={styles.container}>
      <FlatList
        data={data}
        keyExtractor={(item) => item.id}
        renderItem={renderSomeFunction}
      />
    </View>
  );
};

export default SomeScreen;
React Navigation Stack custom using Function to define the left and right side of the header
We can use functions to define options for screens in React Navigation. The navigation prop and route prop can be used to dynamically configure the options for that screen. Different custom components can be defined for Header Left and Header Right.

Here’s an example of how you can use a function for defining options for custom components for the header right. Here we add a cart icon to the right side of the home screen.
import { StatusBar } from "expo-status-bar";
import { StyleSheet } from "react-native";
import { NavigationContainer } from "@react-navigation/native";
import { createStackNavigator } from "@react-navigation/stack";
import { AntDesign } from "@expo/vector-icons";
import CartScreen from "./screens/CartScreen";
import ProductsList from "./screens/ProductsList";


const Stack = createStackNavigator();

export default function App() {
  return (
    <OrdersContextProvider>
      <NavigationContainer>
        <StatusBar style="light" />
        <Stack.Navigator
          initialRouteName="Product"
          screenOptions={{
            headerStyle: { backgroundColor: "#f4511e" },
            contentStyle: { backgroundColor: "#bdbebd" }, // Different style option
            headerTitleStyle: {
              fontWeight: "bold",
            },
            headerTintColor: "white",
          }}
        >
          <Stack.Screen
            name="Products"
            component={ProductsList}
            options={({ route, navigation }) => {
              return {
                title: "Products",
                headerRight: () => (
                  <AntDesign
                    name="shoppingcart"
                    color="white"
                    size={18}
                    style={{ padding: 10, marginRight: 10 }}
                    onPress={() => navigation.navigate("Cart")}
                  />
                ),
              };
            }}
          />
          <Stack.Screen
            name="Cart"
            component={CartScreen}
            options={{
              title: "Cart",
            }}
          />
        </Stack.Navigator>
      </NavigationContainer>
    </OrdersContextProvider>
  );
}
Conclusion
In this article, we learn about react native navigation using Stack and how we can use navigation and route props to add additional activities on routing. In the next articles, we will learn about React native tabs and drawers with examples. Check more information on React Native Navigation Stack documentation
Related React Tutorial