In Ionic, we can easily upload an image file in Firebase as easily as CRUD operation on Firebase through the Angular/Fire module. In this tutorial, we’ll learn how Ionic firebase images are uploaded from the camera or gallery of a mobile device. Firebase has made the life of developers easier as developers don’t have to spend much time building backend servers to build APIs.
We have two important goals behind this article. First how to upload images from our application to Firebase storage of a particular image folder. You can use an Ionic capacitor or Cordova, in our case we are using a Cordova camera to upload an image to firebase storage as the same code. Second, we need to convert our base64 image from camera to png file format.
Prerequisites:
To create and run an Ionic project, We need node js and Ionic CLI already install in our system, if not then check how to install node js and Ionic in Ubuntu. Ionic CLI allows us to create an Ionic project, generate application and library code, and perform a variety of ongoing development tasks such as testing, bundling, and deployment. To install the latest Ionic CLI, open a terminal, and run the following command:
npm install -g @ionic/cliSetting up project for Ionic uploading image to Firebase storage
Let first create an ionic project to set up and configure the project for the Ionic Firebase upload image. As from Ionic version 4 and above, Ionic allows us to create Ionic projects from different Frameworks like Vue, React, and Angular. In our case, we are using the Ionic Angular framework and run the following command to create a project and add the Cordova camera plugin.
ionic start cameraFirebase blank --type=angular
ionic cordova plugin add cordova-plugin-camera
npm install @ionic-native/camera
npm install @ionic-native/core

npm install firebase --save
ng add @angular/fire
Ionic Cordova plugin camera supported many platforms and including Android, Browser, iOS, and Windows.
Note: Since IOS 10 the camera requires permissions to be placed in your config.xml add.
<config-file parent="NSCameraUsageDescription" platform="ios" target="*-Info.plist">
 <string>You can take photos</string>
</config-file>
Create and configure our project in the Firebase console
We have to create a project in Firebase to upload our image to Firebase storage. We need a copy of the web app API from the firebase project to link to our Ionic front-end application. If you already created and configure our Firebase environment, then you can skip the configuration. Otherwise, check our previous Ionic Firebase CRUD operation, we have complete details on how to create and configure the Firebase project.
Note: As in this example, we don’t set any authentication and this is just a tutorial on how to upload an image from the Ionic project to Firebase storage. To access the Firebase storage we have to change to storage rule so that anyone can read/write on storage. This means allowing the public to access. Click on the storage rule and change the value for public access as

Add Firebase web API to our Ionic project
Once we have Firebase web API, then we need to copy our firebase project API key and past API key in our client project src/environments/environment.ts as shown in the code snippet below.
export const environment = {
  production: false,
  firebaseConfig: {
    apiKey: "A...............................s",
    authDomain: "quotesite-b.....firebaseapp.com",
    databaseURL: "https://quotesite-b1....firebaseio.com",
    projectId: "quotesite-b..e",
    storageBucket: "quotesite-b..e.appspot.com",
    messagingSenderId: "7827103245198",
    appId: "1:203541...81105:web:sddgebbb18esdv34c7e575bd0"
  }
};
In our ser/environments/environment.ts file, we have our firebase API configuration information and we need to add this data to our angularFireModule in the app.module.ts file and we also need to import the Cordova camera also. Let’s edit the app.module.ts file.
import { NgModule } from '@angular/core';
import { BrowserModule } from '@angular/platform-browser';
import { RouteReuseStrategy } from '@angular/router';
import { IonicModule, IonicRouteStrategy } from '@ionic/angular';
import { AppComponent } from './app.component';
import { AppRoutingModule } from './app-routing.module';
import { Camera } from '@ionic-native/camera/ngx';
import { AngularFireModule } from '@angular/fire';
import { environment } from '../environments/environment';

@NgModule({
  declarations: [AppComponent],
  entryComponents: [],
  imports: [
    BrowserModule,
    IonicModule.forRoot(),
    AppRoutingModule,
    AngularFireModule.initializeApp(environment.firebaseConfig),
  ],
  providers: [{ provide: RouteReuseStrategy, useClass: IonicRouteStrategy },
    Camera
  ],
  bootstrap: [AppComponent],
})
export class AppModule { }
Add code to upload image to Firebase storage
In our home.page.html template let’s add three buttons, one to upload an image from a camera and the other to upload an image from a mobile device. Once we get the image from the camera, then we are displaying it on our screen and we have an upload button to upload the image to Firebase storage.
<ion-header [translucent]="true">
  <ion-toolbar>
    <ion-title>
      Ionic firebase image upload
    </ion-title>
  </ion-toolbar>
</ion-header>

<ion-content [fullscreen]="true">
  <ion-grid>
    <ion-row class="ion-align-self-center">
      <ion-col size="6">
        <ion-button (click)="takePhoto(1)">Show Camera</ion-button>
      </ion-col>
      <ion-col size="6">
        <ion-button (click)="takePhoto(0)">Show Album</ion-button>
      </ion-col>
    </ion-row>
  </ion-grid>
  <div *ngIf="base64Image">
    <img [src]="base64Image">
    <ion-button (click)="upload()">Upload to Firebase!</ion-button>
  </div>
</ion-content>
Logic to get image from camera or gallery of mobile device.
We are using the Ionic Cordova camera plugin to get images from the camera and gallery and you can use the Capacitor camera also. As logic for uploading images is the same for both. We have to use the Angular/fire module to upload images, is also possible to upload images using the firebase module also. Let’s edit the home.page.ts file.
import { Component } from '@angular/core';
import { Camera, CameraOptions } from '@ionic-native/camera/ngx';
import { AngularFireStorage } from "@angular/fire/storage"
import { AlertController } from '@ionic/angular';
import { map, finalize } from "rxjs/operators";
import { Observable } from "rxjs";
@Component({
selector: 'app-home',
templateUrl: 'home.page.html',
styleUrls: ['home.page.scss'],
})
export class HomePage {
base64Image: string;
selectedFile: File = null;
downloadURL: Observable<string>;
constructor(private camera: Camera,
private alertCtrl: AlertController,
private storage: AngularFireStorage) { }
async takePhoto(sourceType: number) {
const options: CameraOptions = {
quality: 100,
destinationType: this.camera.DestinationType.DATA_URL,
encodingType: this.camera.EncodingType.JPEG,
mediaType: this.camera.MediaType.PICTURE,
sourceType
};
this.camera.getPicture(options).then((imageData) => {
// imageData is either a base64 encoded string or a file URI
this.base64Image = 'data:image/jpeg;base64,' + imageData;
}, (err) => {
// Handle error
console.error(err);
});
}
upload(): void {
var currentDate = Date.now();
const file: any = this.base64ToImage(this.base64Image);
const filePath = `Images/${currentDate}`;
const fileRef = this.storage.ref(filePath);
const task = this.storage.upload(`Images/${currentDate}`, file);
task.snapshotChanges()
.pipe(finalize(() => {
this.downloadURL = fileRef.getDownloadURL();
this.downloadURL.subscribe(downloadURL => {
if (downloadURL) {
this.showSuccesfulUploadAlert();
}
console.log(downloadURL);
});
})
)
.subscribe(url => {
if (url) {
console.log(url);
}
});
}
async showSuccesfulUploadAlert() {
const alert = await this.alertCtrl.create({
cssClass: 'basic-alert',
header: 'Uploaded',
subHeader: 'Image uploaded successful to Firebase storage',
message: 'Check Firebase storage.',
buttons: ['OK']
});
await alert.present();
}
base64ToImage(dataURI) {
const fileDate = dataURI.split(',');
// const mime = fileDate[0].match(/:(.*?);/)[1];
const byteString = atob(fileDate[1]);
const arrayBuffer = new ArrayBuffer(byteString.length);
const int8Array = new Uint8Array(arrayBuffer);
for (let i = 0; i < byteString.length; i++) {
int8Array[i] = byteString.charCodeAt(i);
}
const blob = new Blob([arrayBuffer], { type: 'image/png' });
return blob;
}
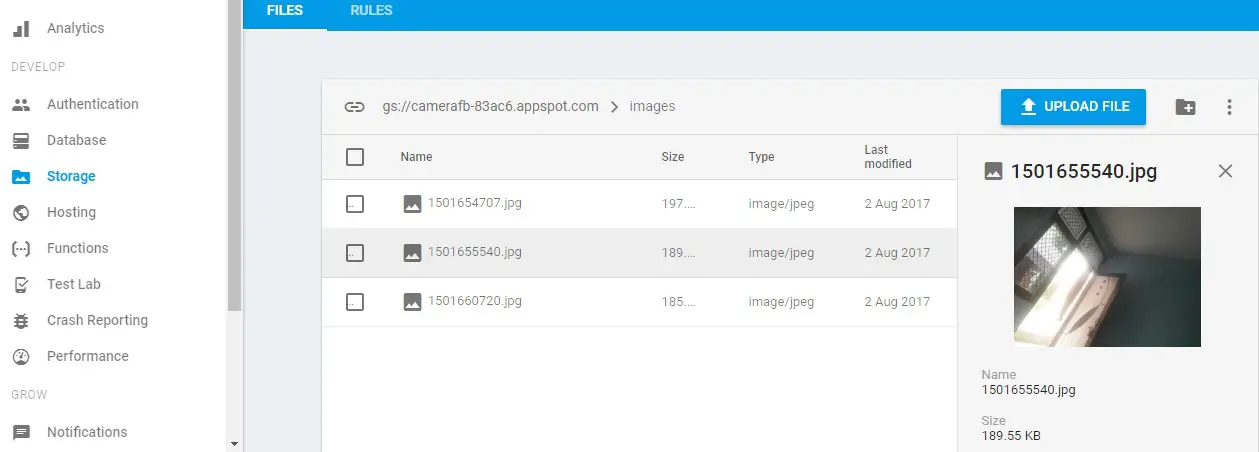
}To upload a photo, we will first need to get a reference from the Firebase storage root and need a file path. After that, we need to set the file path in Firebase Storage. In this app, we have defined that all pictures must be inside a path ./images/filename-.jpg.
Once we have the image path reference we will need to do the actual uploading using the storage.upload method from AngularFireStorage class.
This method requires 2 parameters, which are the data of the actual picture, and the path of image upload.
Since our picture was captured by the camera and stored inside the base64Image which is base64 format, we need to convert it to actual image format. We have the base64ToImage method that will convert base64 to png file format then we png format image to upload to firebase.
Show prompt when upload succeeds
We are using the AlertControlle component from the @ionic/angular package to display an alert box for successfully uploading a photo to firebase. To achieve this we have to import AlertController and inject it into our constructor.
Conclusion
In this article, we have explored details on how to upload images from our Ionic apps to firebase storage using the angular/fire module. If you’re using an Ionic upload image from the camera then we need to convert base64 to image format like png. I hope that this article was able to get you up and running with the Ionic firebase image upload to Firebase storage.
Related posts