Ionic Capacitor Camera API allows users to pick a photo from their photo album or take a picture from the camera in Progressive Native Web, Mobile, and Desktop applications. We can use the Ionic Cordova camera if we’re only building applications for mobile-specific. The release of ionic 4 and above allow us to use both Cordova and ionic capacitor.
In this articles, we will explore how to install and used Ionic capacitor camera both in mobile and desktop browser. Let’s get started.
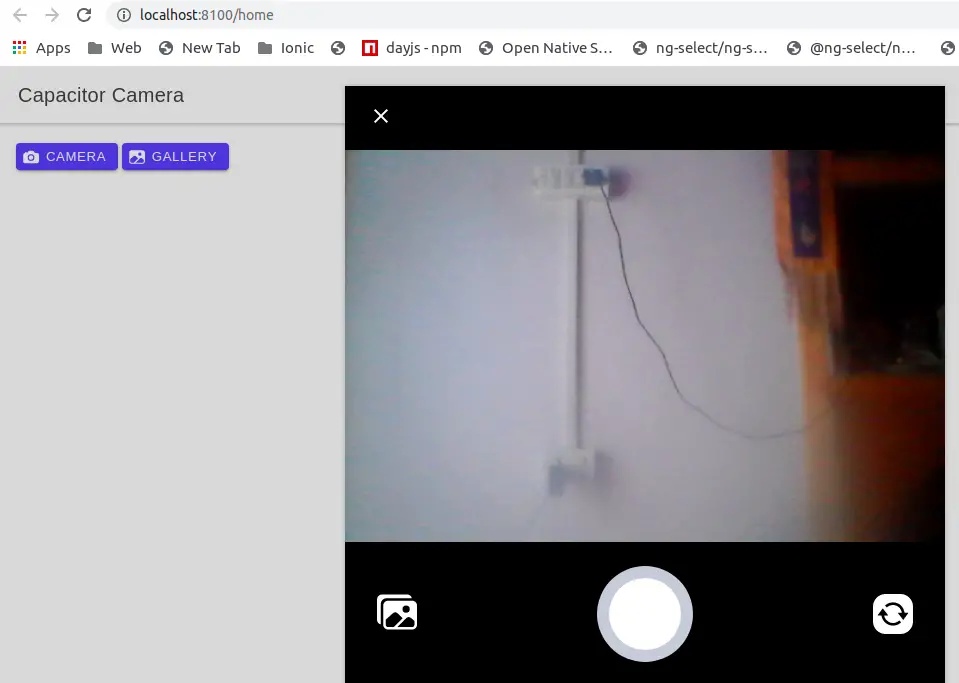
Example of an Ionic Capacitor camera application
In these articles, we will learn how to use a device camera to capture an image and if the camera is not available then we will use a fallback method to load images from a file input. In our example, we had two buttons.
- One to take the photo using a device camera on both mobile and desktop.
- The other button to load an existing picture from the mobile album and on desktop, we will get an image from a file input.
Setting up the Ionic project for Ionic Capacitor Camera
With the release of ionic version 4, no longer limited to angular, we can create the ionic projects in different front-end frameworks like Angular, Vue, and React. In this example, we’re using an Ionic angular project. Let create an Ionic angular project.
ionic start cameraApps blank --type=angularOnce we execute the above command, it will allow us to select a framework and template. We have to select the Angular framework and select a blank template.

Adding Capacitor and platform for our project.
When creating an Ionic application, it will ask you whether you want to add a capacitor or not. We have to press yes to add a capacitor to our Ionic application. Once we have created our Ionic capacitor camera project. We need to install the Capacitor camera plugin. Let’s add it.
npm install @capacitor/camera
npx cap sync
Installing and importing PWA Elements in our project
Some Capacitor plugins, such as Camera or Toast, have web-based UI available when not running natively. Ionic Capacitor camera plugin works perfectly in a mobile device with installing PWA elements. When we are creating an application through electron and run application inside the desktop browser will get an error in our console as:
ERROR Error: Uncaught (in promise): TypeError: cameraModal.present is not a function
We need to install the PWA element library and it provides web-based UI for our camera in the browser.
$npm install @ionic/pwa-elementsThen, depending on your framework of choice, import the element loader and call it at the correct time. In our case, we are using the Ionic Angular framework and adding the following code in the src/main.ts file
import { enableProdMode } from '@angular/core';
import { platformBrowserDynamic } from '@angular/platform-browser-dynamic';

import { AppModule } from './app/app.module';
import { environment } from './environments/environment';
import { defineCustomElements } from '@ionic/pwa-elements/loader';

if (environment.production) {
  enableProdMode();
}

platformBrowserDynamic().bootstrapModule(AppModule)
  .catch(err => console.log(err));
defineCustomElements(window);
Adding code for Ionic capacitor camera in our component
We have a method to take a picture from the camera and gallery in mobile and in desktop allow to take a picture from the camera, if the camera exists and if the camera didn’t exist then use the fallback method to take a picture from a file input. Add the following code to your template file
<ion-header>
  <ion-toolbar>
    <ion-title>Capacitor Camera</ion-title>
  </ion-toolbar>
</ion-header>

<ion-content class="ion-padding">
  <ion-button size="small" (click)="getPicture()">
    <ion-icon name="camera" slot="start"></ion-icon>
    <ion-label>Upload Image</ion-label>
  </ion-button>
  <ion-button size="small" (click)="getPicture()">
    <ion-icon name="image" slot="start"></ion-icon>
    <ion-label>Gallery</ion-label>
  </ion-button>
  <input type="file" *ngIf="isDesktop" #filePicker (change)="onFileChoose($event)"/>

  <ion-card *ngIf="photo">
    <ion-card-content>
      <img [src]="photo">
    </ion-card-content>
  </ion-card>

</ion-content>
Add the following code in the component file as
import { Component, ElementRef, ViewChild, OnInit } from '@angular/core';
import { Capacitor } from '@capacitor/core';
import { DomSanitizer, SafeResourceUrl } from '@angular/platform-browser';
import { Platform } from '@ionic/angular';
import { Camera, CameraResultType, CameraSource } from '@capacitor/camera';

@Component({
  selector: 'app-camera',
  templateUrl: './camera.page.html',
  styleUrls: ['./camera.page.scss'],
})
export class CameraPage implements OnInit {
  @ViewChild('filePicker', { static: false }) filePickerRef: ElementRef<HTMLInputElement>;
  photo: SafeResourceUrl;
  isDesktop: boolean;


  constructor(
    private platform: Platform,
    private sanitizer: DomSanitizer) { }

    ngOnInit() {
      if ((this.platform.is('mobile') && this.platform.is('hybrid')) || this.platform.is('desktop')) {
        this.isDesktop = true;
      }
    }

  async getPicture() {
    if (!Capacitor.isPluginAvailable('Camera') || (this.isDesktop && type === 'gallery')) {
      this.filePickerRef.nativeElement.click();
      return;
    }

    const image = await Camera.getPhoto({
      quality: 100,
      width: 400,
      allowEditing: false,
      resultType: CameraResultType.DataUrl,
      source: CameraSource.Prompt
    });

    this.photo = this.sanitizer.bypassSecurityTrustResourceUrl(image && (image.dataUrl));
  }

  onFileChoose(event: Event) {
    const file = (event.target as HTMLInputElement).files[0];
    const pattern = /image-*/;
    const reader = new FileReader();

    if (!file.type.match(pattern)) {
      console.log('File format not supported');
      return;
    }

    reader.onload = () => {
      this.photo = reader.result.toString();
    };
    reader.readAsDataURL(file);

  }

}
Hide the input file by adding display none in scss file.
input[type="file"] {
    display: none;
}
Conclusion
We have learned how to install and use an Ionic capacitor camera example. I also demonstrate how we can use file upload to add images in the browser and it is not needed for the Ionic Capacitor camera.
Related posts
Sory but:
Error: src/app/home/home.page.ts:29:70 – error TS2304: Cannot find name ‘type’.
29 if (!Capacitor.isPluginAvailable(‘Camera’) || (this.isDesktop && type === ‘gallery’)) {
Hi, In the below code it is showing error
async getPicture() {
if (!Capacitor.isPluginAvailable(‘Camera’) || (this.isDesktop && type === ‘gallery’)) {
this.filePickerRef.nativeElement.click();
return;
}
Error: src/app/tab2/tab2.page.ts:29:69 – error TS2304: Cannot find name ‘type’.
29 if(!Capacitor.isPluginAvailable(‘Camera’) || (this.isDesktop && type === ‘gallery’)){